Saturday, January 27, 2007
Water treatment options
 Don't drink the water!
At least untreated, that is. Here are some ways to treat found water.**
The top red is just a metal water bottle -- you can bring tap water with you
On the left is a filter bottle with iodine -- great and convient, but yucky taste
In the blue bag is a 'first need' water filter
the tiny bottle is iodine tablets -- add them and wait 30 minutes -- also has a bad taste
on the right is a platypus foldable bottle.
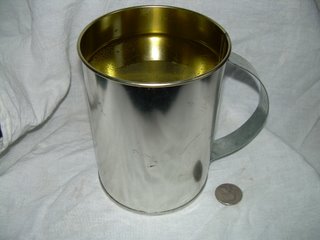
the little silver dot is a quarter, for scale
the mug is a sierra cup, in case you wanted to treat ( boil) small amounts of water.
( it is possible, just really slow.)
I'm considering offering a class just on finding/ treating water.
( ** Any water found in the wild is questionable and you should treat it.)
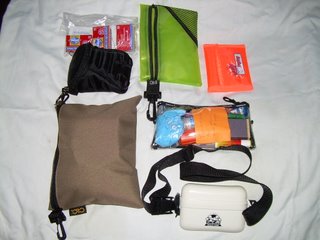
Various survival kit containers

A variety of kit ideas and sizes.
From upper left, going across: plastic ziploc bag, camera bag with belt loop, a zippered pencil case, nylon wallet, brown fabric case (sold in tool stores) a plastic make up pouch and a "beach safe" on a belt.
So you can carry as much or as little as you want. The idea with this slide is to show students a variety of ways to carry your FAK/survival items.
Note: the brown case and clear make-up case are shown --with contents-- elsewhere on this blog.
#
Labels: homemade gear, kits, planning
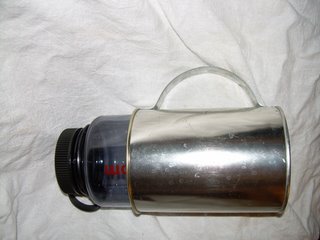
Big mug

 This is a BIG mug that fits over the end of a Naglene (or similar) water bottle. If necessary, I could boil water in the thing. The quarter is for scale.
Another option is the "space saver cup" that also fits over the end of a water bottle $6-8.
A backpacking kit (in progress) UPDATE 2009

Here is a kit I might carry on an overnight backpacking trip.
Its got the basics covered with:
Water: bags, tablets
Shelter: Space blanket, garbage bags(x2)
Fire: Matches(x2)
Signaling: Mirror, whistle
Tools: Knife, wire saw, compass on wrist band
First aid: sanitary napkin for stopping big bleeding) band-aids, gloves
Comfort items: Kleenex
NOTES: It has no food, as that attracts bears. The knife is a swiss army model with a locking blade. Looking it over, I would add:
Flagging tape,
sunblock chapstick,
Tyneol and pepto meds,
safetypins
cordage (probably 50# test fishing line)
Duct tape 3 m wound on a pencil stub
This is in adition to the regular backpacking gear -- tent, sleeping bag, food, stove, pack, etc.
{ In response to a comment; the gear in in the origional packages for photo purposes only. When I pack it along its out of the packages.}
Labels: DIY, homemade gear, survival kit
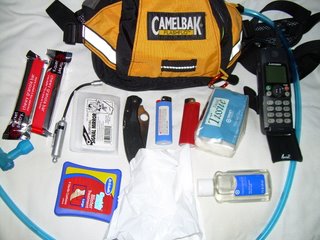
Hiking kit

My day hiking kit.
This is what I carry for "a walk in the park." It all fits in the camelbak 'flashflo'waistpack. The little bendy thing in a flashlight, and in the center are two 13 gallon trash bags. The most important item? The (charged) cell phone.
This kit is evolving; I have added 15' of parachute cord, and will add a whistle and small compass. Outside of this I am usually wearing a hat for sun protection and a seasonal jacket.
TRO
comments welcome